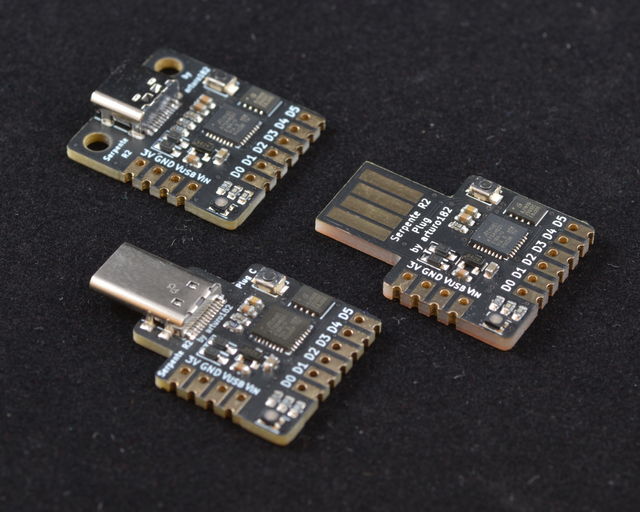
Arturo182 Serpente
Overview
The Serpente is a very small low-cost development and prototyping board equipped with 4MiB flash storage, a PWM enabled RGB led and 6 I/O pins. The board comes with 3 different USB connector options: USB Type-C plug, USB Type-C socket and USB Type-A plug.

Hardware
ATSAMD21E18A ARM Cortex-M0+ processor at 48 MHz
256 KiB flash memory and 32 KiB of RAM
Extra 4MiB SPI flash memory
RGB User LED
Reset button
Native USB port
Supported Features
The Serpente board configuration supports the following hardware features:
Interface |
Controller |
Driver/Component |
|---|---|---|
NVIC |
on-chip |
nested vector interrupt controller |
Flash |
on-chip |
Can be used with LittleFS to store files |
SYSTICK |
on-chip |
systick |
WDT |
on-chip |
Watchdog |
GPIO |
on-chip |
I/O ports |
PWM |
on-chip |
Pulse Width Modulation |
USART |
on-chip |
Serial ports |
SPI |
on-chip |
Serial Peripheral Interface ports |
USB |
on-chip |
USB device |
Other hardware features are not currently supported by Zephyr.
The default configuration can be found in the Kconfig file boards/arm/serpente/serpente_defconfig.
Connections and IOs
The Serpente documentation 1 has detailed information about the board including pinouts 2 and the schematic 3.
System Clock
The SAMD21 MCU is configured to use the 8MHz internal oscillator with the on-chip PLL generating the 48 MHz system clock.
USB Device Port
The SAMD21 MCU has a USB device port that can be used to communicate with a host PC. See the USB Samples sample applications for more, such as the USB CDC ACM Sample Application sample which prints “Hello World!” to the host PC.
Programming and Debugging
The Serpente ships the BOSSA compatible UF2 bootloader. The bootloader can be entered by quickly tapping the reset button twice.
Flashing
Build the Zephyr kernel and the Blinky sample application:
west build -b serpente samples/basic/blinkyConnect the Serpente to your host computer using USB
Tap the reset button twice quickly to enter bootloader mode
Flash the image:
west build -b serpente samples/basic/blinky
west flash
You should see the User LED blink.